Hello everyone.
I will provide a general overview about Robot Framework and create a simple web automation project demo.
What is Robot Framework?
Robot Framework is an open-source test automation tool introduced by Pekka Klärck in 2005 as a master’s thesis. It is designed for user acceptance testing, acceptance test-driven development (ATDD), and robotic process automation (RPA).
Robot Framework, which is based on Python, enables the practical writing of test scenarios using Keyword Driven Testing and Data Driven Testing approaches.
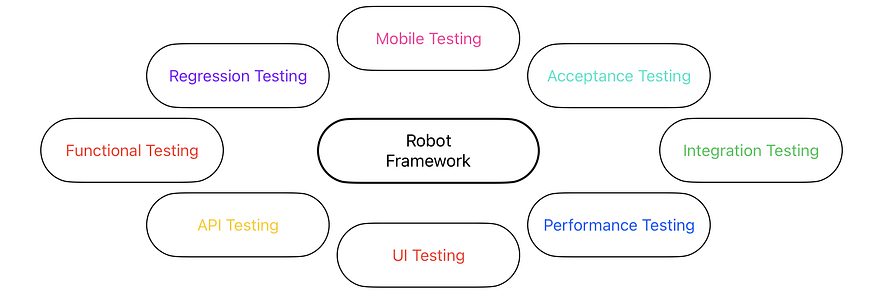
We can automate various types of tests with Robot Framework. These are;
Keyword Driven Testing
One of the most prominent features of Robot Framework is its ability to rapidly create test scenarios using the Keyword-driven approach.
In the Keyword-driven testing approach, test scenarios are defined as a series of keywords or code blocks and combined into larger functional blocks. The biggest advantage of this approach is that a keyword defined once can be reused in other scenarios as well.

Let’s define a keyword that includes the flow of logging into a system with user information. this scenario can be done in 5 steps simply. When we define the steps “Open Browser” and “Go to URL” in a different keyword, we can shorten our scenario writing time by writing the necessary “Open Browser” and “Go to URL” actions in one step instead of two steps at the beginning of every scenario
To provide a more effective example,

If we take a closer look at the password change scenario, the user needs to be logged into the system in order to change their password. At this point, we can create a keyword called “Log in with email” and write the login process within this keyword. By invoking the “Log in with email” keyword in every scenario where the user needs to log into the system, not just in the password change scenario, we can bypass the login process by writing a single line.
By also utilizing the previously defined “Go to Base URL” keyword within the “Log in with user information” keyword, we can reduce a nine-step scenario to as few as five lines by nesting the keywords we write
Web Automation Test with Robot Framework
In order to work with Robot Framework, we need to have Python and a preferred IDE installed on our computer. I will proceed with the process using PyCharm CE as my IDE.
Robot Framework Syntax
The methods for defining libraries, variables, keywords, and scenarios in .robot files are as follows:
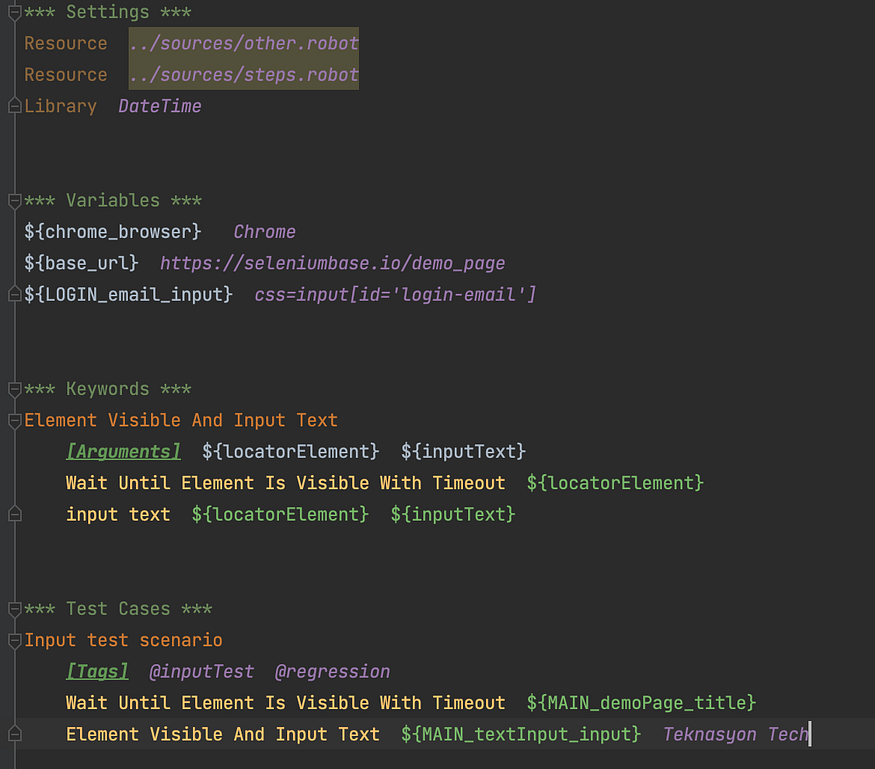
- *** Settings *** : This is the section where we define libraries and different file paths.
- *** Variables *** : We define variables that are required in our test scenarios.
- *** Keywords *** : In this area, we write the keywords that we define to be reused in various test scenarios.
- *** Test Cases *** : This is the segment where we write the entire test scenarios.
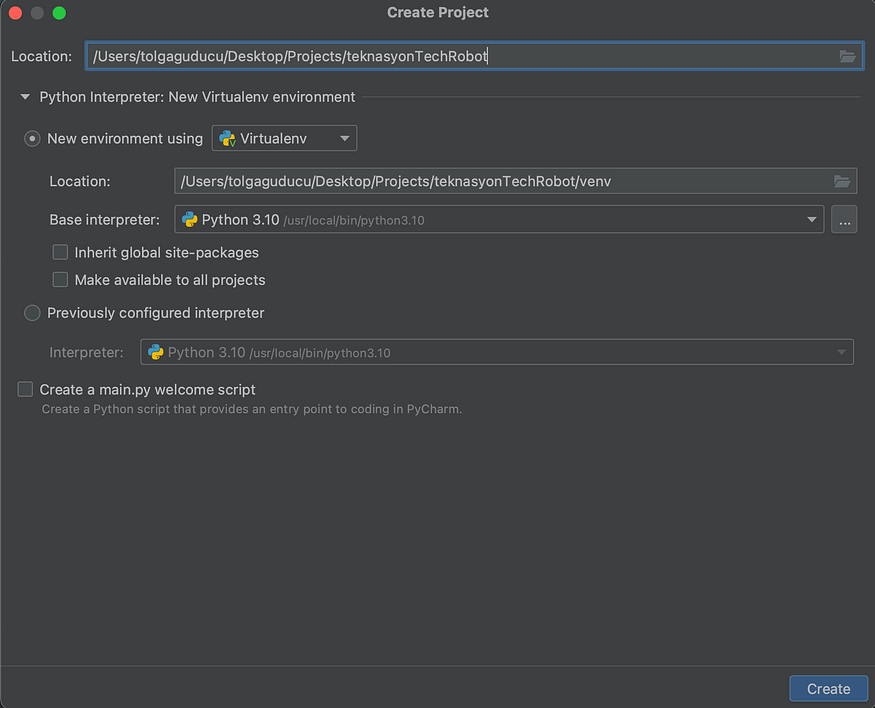
Let’s start by creating a Python project in PyCharm for the example I will demonstrate using Robot Framework.
Next, we create a folder named ‘sources’ in our project directory. We will keep the project requirements within this folder. During the project process, we will need to specify the required libraries by creating a text file named ‘requirements.txt’ and writing the library names along with their version information.

robotframework==4.1.2
robotframework-seleniumlibrary==6.0.0
webdriver-manager==3.8.3
robotframework-pabot==2.6.0
- robotframework: The core library of Robot Framework.
- robotframework-seleniumlibrary: Selenium library for Robot Framework.
- webdriver-manager: We use this to simplify the management and setup of WebDriver drivers for different browsers, allowing seamless browser automation without manual driver installations or configurations.
- robotframework-pabot: We need pabot library to enable parallel execution of test cases, significantly reducing the overall execution time by distributing the workload across multiple processes or machines.
To activate the virtual environment and install the dependencies specified in the requirements;
python3 -m venv venv
source venv/bin/activate
pip3 install -r sources/requirements.txtWe should execute the mentioned commands above in the terminal within PyCharm.
Afterwards, we create the files ‘driver.py’ and ‘setup.robot’ under a directory named ‘base’.
In the ‘driver.py’ file, we write the code that will install the latest version of the Chrome driver using the ‘webdriver-manager’ library.

from webdriver_manager.chrome import ChromeDriverManager

def get_chrome_driver():
    chrome_driver = ChromeDriverManager().install()
    return chrome_driver
We write the processes that need to be performed at the beginning and end of test scenarios in the ‘setup.robot’ file.
“Setup Chrome Driver” keyword launches the Chrome driver and navigates to the ${base_url} defined in the Variables section to initiate the scenario. On the other hand, “Close All Driver” keyword ensures that the browser is closed after the test scenario execution is completed.
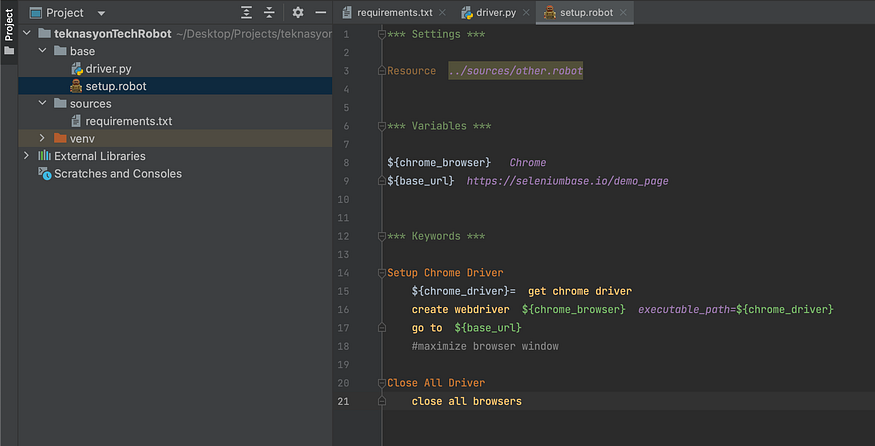
*** Settings ***

Resource  ../sources/other.robot


*** Variables ***

${chrome_browser}   Chrome
${base_url}  https://seleniumbase.io/demo_page


*** Keywords ***

Setup Chrome Driver
    ${chrome_driver}=  get chrome driver
    create webdriver  ${chrome_browser}  executable_path=${chrome_driver}
    go to  ${base_url}
    #maximize browser window

Close All Driver
    close all browsers
In order to use the Page Object Model (POM) structure in our project, we continue building our project architecture by creating the ‘steps’, ‘variables’, and ‘tests’ folders under the main directory.
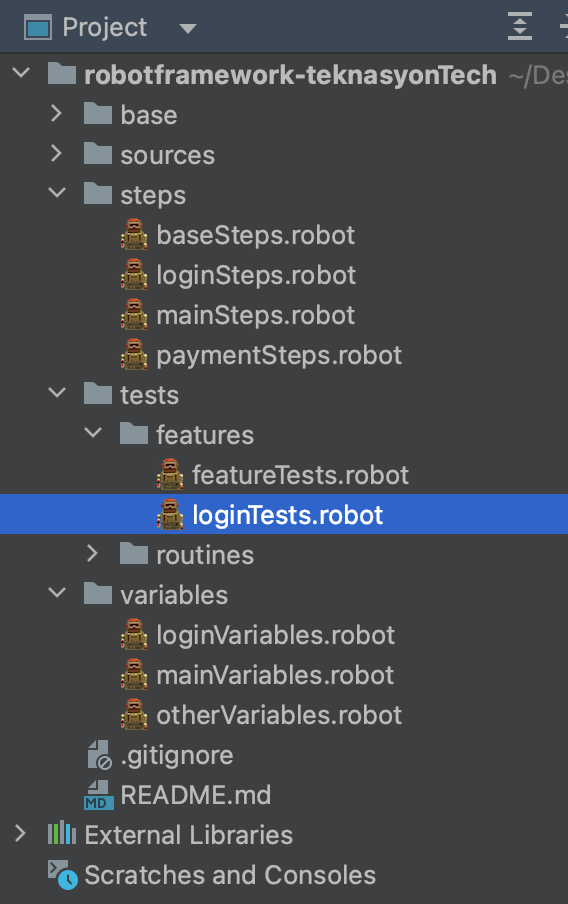
Let’s assume that there is a login page in the system, and we want to write the test scenarios for the login flow.
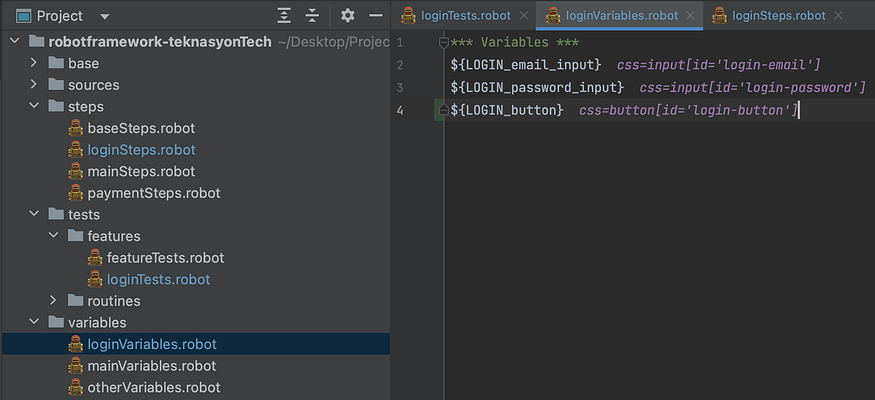
- Create a file named “loginVariables.robot” in the “variables” folder to store the element locators for the login page.
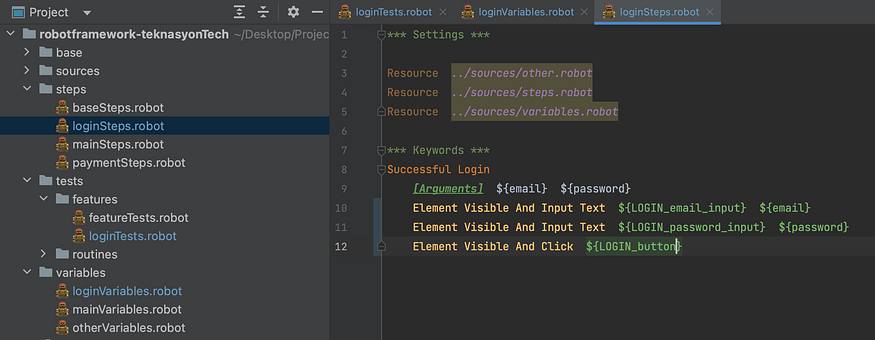
- Create a file named “loginSteps.robot” in the “steps” folder to write the necessary steps for the login flow.
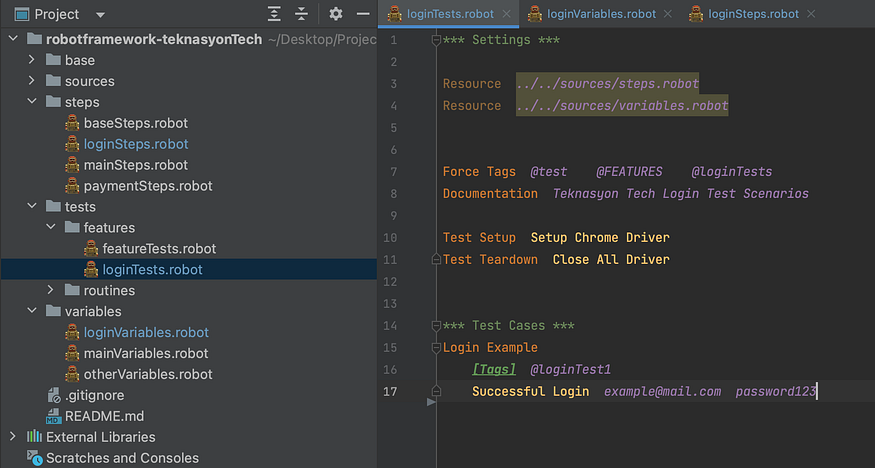
- Create a file named “loginTests.robot” in the “tests” folder to write the login test scenarios.
Afterwards, we create the “steps.robot” and “variables.robot” files inside the “sources” folder. Here, we define the paths to all the step and variable files that we have created by selecting each individual page of the system. This way, when we want to run the test scenarios, we can access all the steps with just one file path in a single line (the same goes for variables).


To write the most fundamental methods that we will use in our test scenarios, we should create the “baseSteps.robot” file in the “steps” folder.Here, we write the keywords that we can use in all scenarios, such as waiting for an element to be visible, clicking on an element, and checking the content of a text, etc. For example;
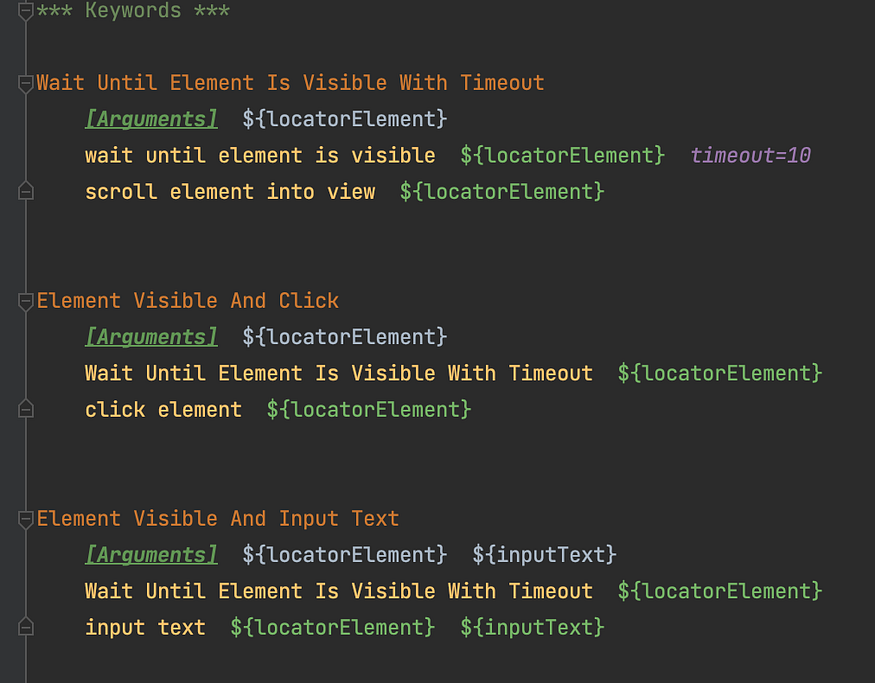
Wait Until Element Is Visible With Timeout
    [Arguments]  ${locatorElement}
    wait until element is visible  ${locatorElement}  timeout=10
    scroll element into view  ${locatorElement}
Element Visible And Click
[Arguments] ${locatorElement}
Wait Until Element Is Visible With Timeout ${locatorElement}
click element ${locatorElement}We wait for an element to be visible on the page for a specified number of seconds determined by the timeout with “Wait Until Element Is Visible With Timeout” keyword
By calling the “Wait Until Element Is Visible With Timeout” keyword within the “Element Visible And Click” method, we ensure that the element is visible on the page before clicking on it. This allows us to prevent the test from failing due to delays in the loading of short-lived page elements.
Coding the Test Scenarios
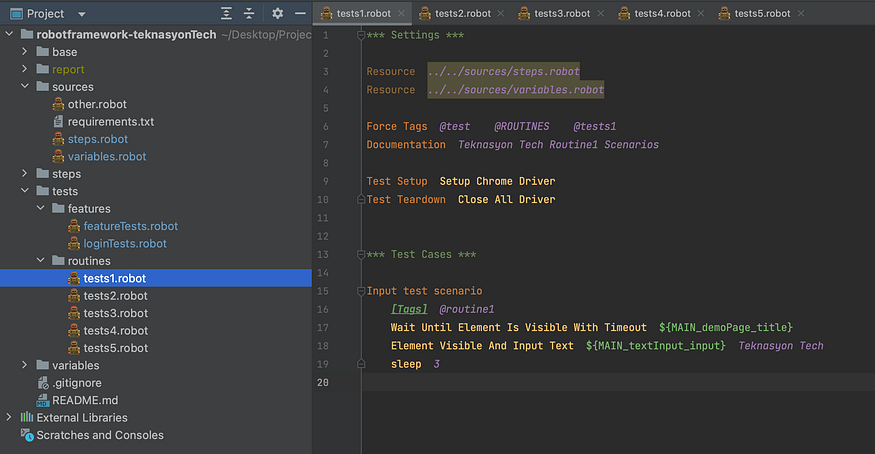
To write the test scenarios in the .robot file, we first need to fill in the Settings section. Here, we define the file paths for the steps and variables files created in the “sources” folder.
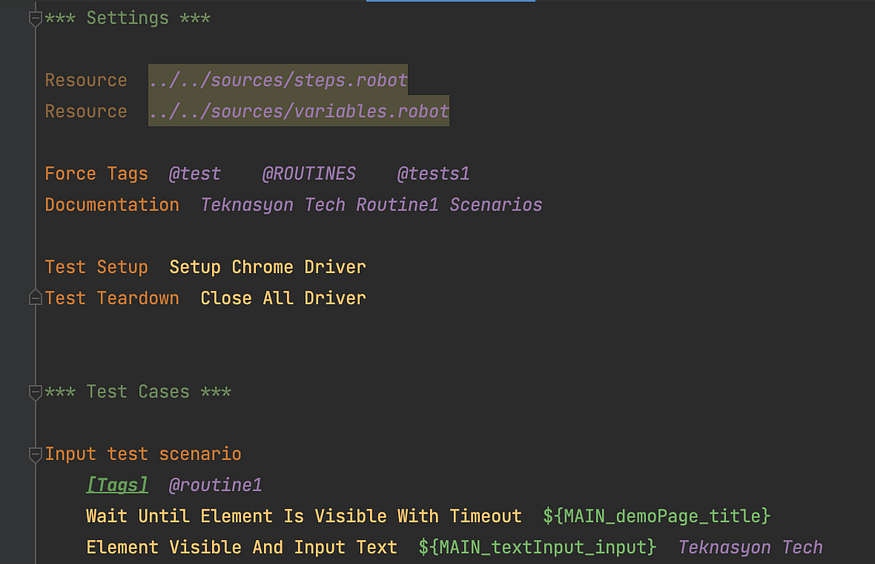
“Force Tags” allows for easy categorization of test scenarios by using tags to define their execution. In this example, when initiating the test execution with tags such as “@test”, “@ROUTINES”, or “@tests1”, all the scenarios in the feature file will be executed.
The “Documentation” keyword can be used as informational text during the execution of test scenarios.
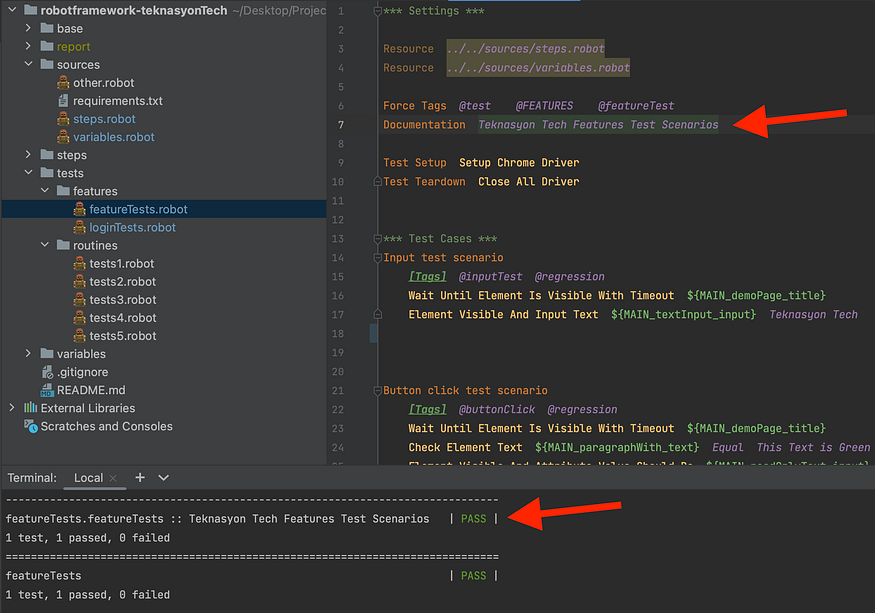
In the “Test Setup” and “Test Teardown” lines, we invoke the “Setup Chrome Driver” and “Close All Driver” keywords that we have previously created for the steps we want to be executed at the start and end of each test scenario. This allows us to start the driver, navigate to the base URL, perform the scenario steps, and then close the browser for each test.
Once we have completed the settings in the “*** Settings ***” section, we are ready to write our test scenarios.
In the “*** Test Cases ***” section, we need to start by defining the name of our scenario. If we want to create a specific tag for the test case, we can do so by adding it in the [Tags] line, followed by writing our test scenario flow step by step.
Running Tests
After creating the test scenarios as shown above, it’s time to execute these scenarios.
There are multiple ways to run tests. These are;
> robot -d report tests/features/featureTests.robotWhen executing the above code block in the terminal of PyCharm, it will sequentially run all the test scenarios in the “futureTests.robot” file.
> robot -d report -i @inputTest tests/features/featureTests.robotBy adding the “@inputTest” tag as shown here and executing this code, only the scenario with the “@inputTest” tag will be executed.
pabot --processes 5 -d report tests/routines/*.robotAnother approach is to run the tests in parallel using the Pabot library.
By using the command “pabot -processes 5” in the terminal, we can execute the tests simultaneously in 5 different browsers. This allows us to complete a test process that would take “3 minutes” in just “29 seconds”.
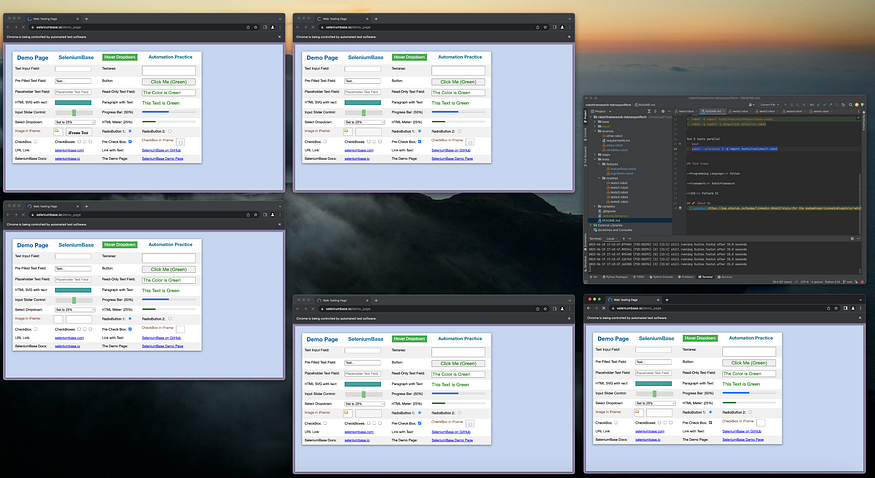
Additionally, we can modify the number “5” inside the “pabot -processes 5” command according to our preference. We can specify the number of browsers in which we want the tests to run simultaneously by adjusting this value within the command.
Test Reports
The “-d report” code within the command we use to run the tests allows Robot Framework to generate a test report.
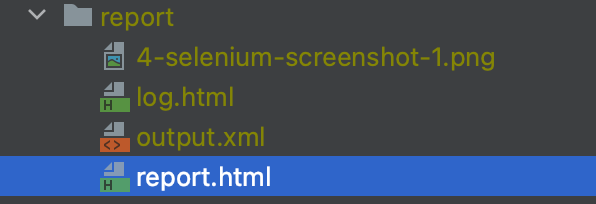
We can open the “report.html” file with any web browser to access the detailed test report.
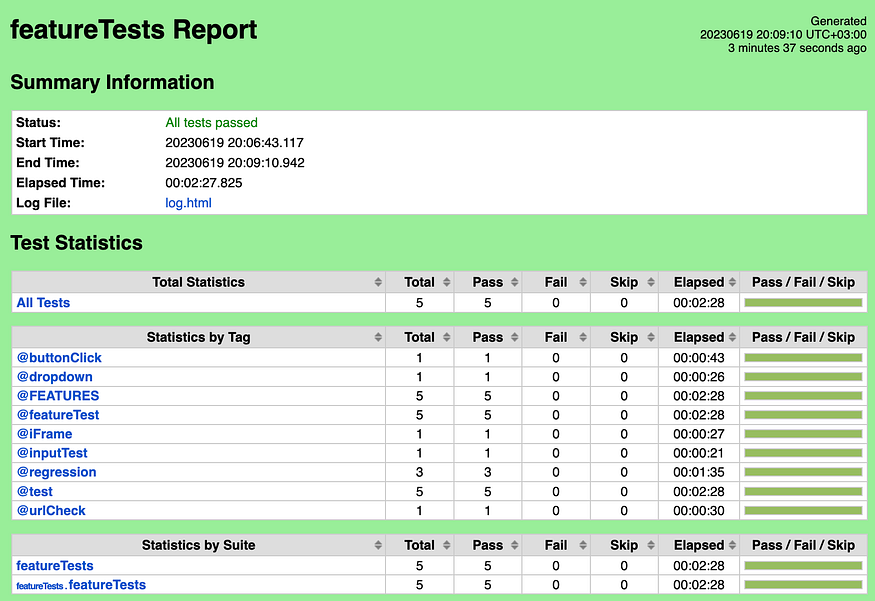
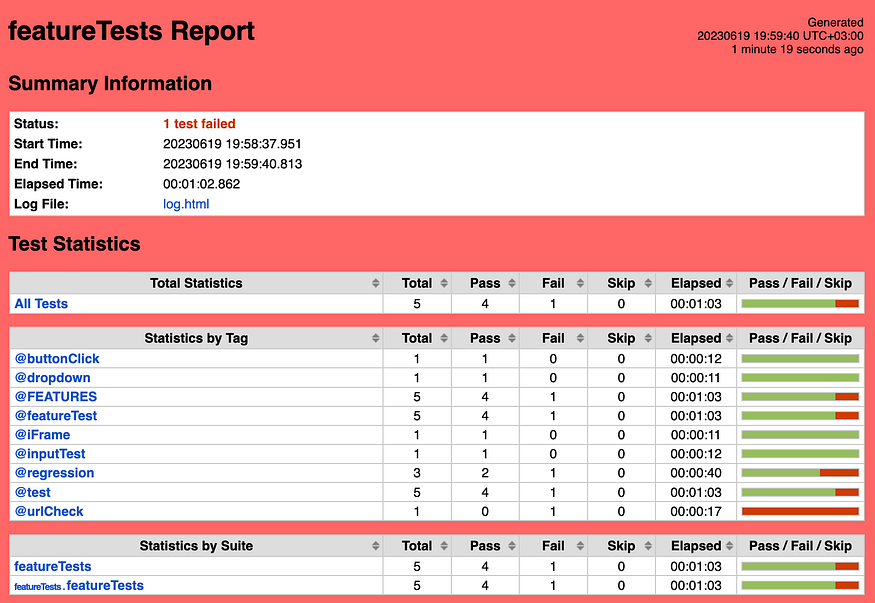
The Summary Information section provides an overview of whether the tests have passed or failed and provides information on how long the test execution took.
In the Test Statistics section, the Total Statistics part displays the overall pass/fail status of all the tests. Additionally, it provides information on which tests have passed or failed based on Suite and Tag categories.
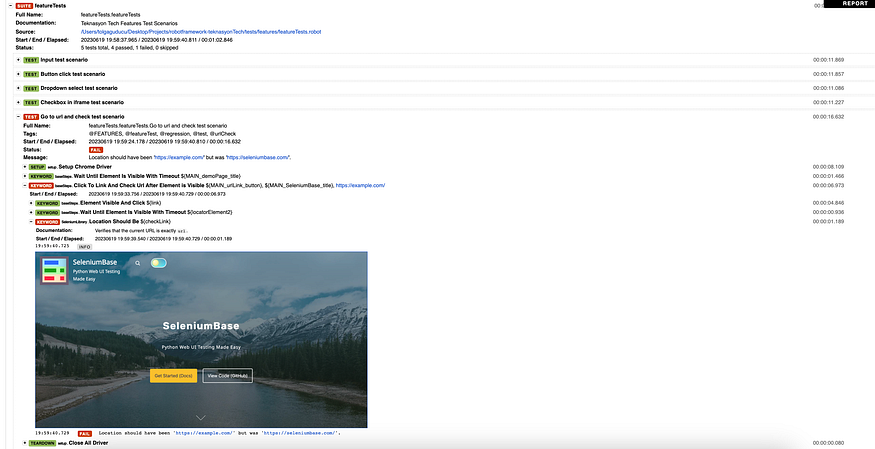
When we navigate to the details of a failed test scenario, we can clearly see at which step of the scenario we encountered the error. Additionally, when the Robot Framework encounters an error, it captures a screenshot and includes it in the report as evidence. Thus, we can generate clear and meaningful outputs for each encountered error, allowing us to intervene quickly.
I tried to provide a general overview of Robot Framework and support it with a demo project to enhance your understanding with this article.
If you want to access the demo project, you can find it on GitHub.
You can always reach out to me on LinkedIn to get in touch, ask questions, or provide feedback.
Thank you.


No comments:
Post a Comment