Differences between Git and GitHub
Git is a version control system that manages and keeps track of your code. GitHub, on the other hand, is a service that let you host, share, and manage your code files on the internet.
GitHub uses Git underneath, and lets you manage your Git repositories or folders easily on its platform.
So Git is the actual version control system and GitHub is the platform where you host your code.
If you want to learn more about the differences between these two tools, you can read this tutorial.
How to Start Using Git and GitHub
Step 1 – Install Git
Git comes preinstalled in some Macs and Linux-based systems, but you can always check if you have Git installed in your machine by typing git version in your terminal. You can use the Command Prompt to do this.
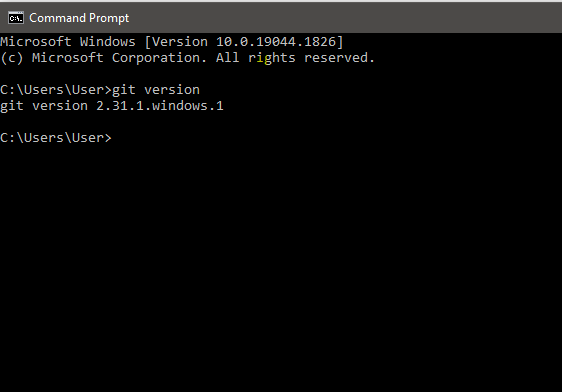
As you can see above, I have Git version 2.31.1 installed on my Windows computer. If you don't have Git installed in your computer, you won't get a version.
You can download Git here and then select your operating system to download.
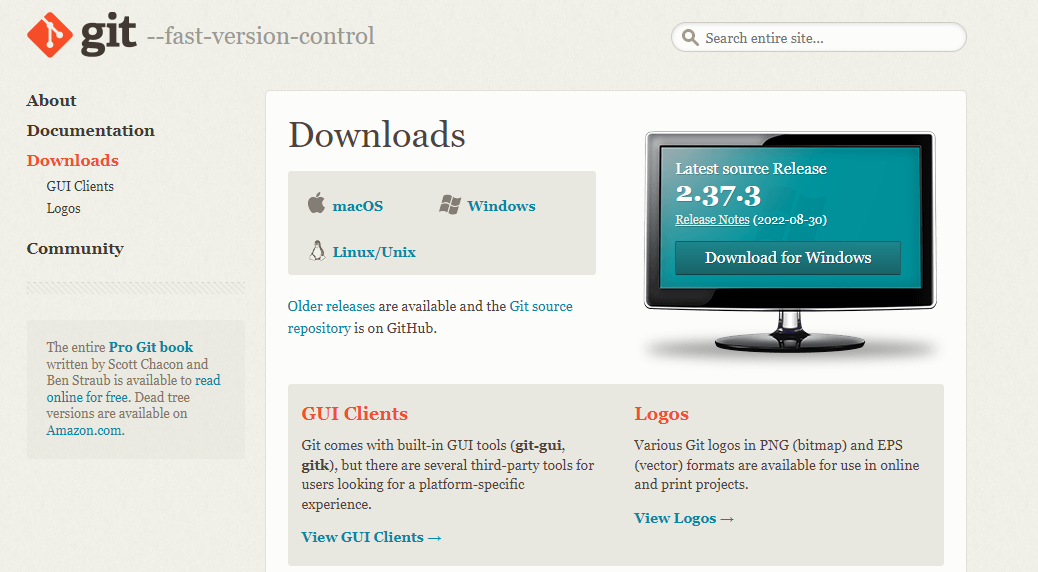
Follow the necessary installer guide until installation is complete. Open the command prompt and type git version to verify that Git was successfully installed.
Step 2 – Create a GitHub Account.

To create an account on GitHub, you will be asked for some personal information like name, confirm your email, set a username and password, and your account should be set up in minutes.
Create an account on GitHub.com here.
Step 3 – Connect your GitHub account to your Git account.
You'll do this from your terminal.
To set your Git username, type this in your terminal:
git config --global user.name "Segun Ajibola"To confirm that you have set your Git username correctly, type this:
git config --global user.nameYou should have "Segun Ajibola" as the output.
To set your Git email, type this in your terminal:
git config --global user.email "youremail@gmail.com"To confirm that you have set your Git email correctly, type this:
git config --global user.emailYou should have "youremail@gmail.com" as the output.
You will be asked to authenticate your GitHub account, so just sign in with the same email to confirm.
Step 4 – Create and edit your code files locally

Step 5 – Create a repository on GitHub
Click the + sign at the top right corner to create a new repository. Repositories are like your code folders online.
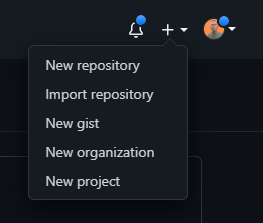
You will be prompted to this page:
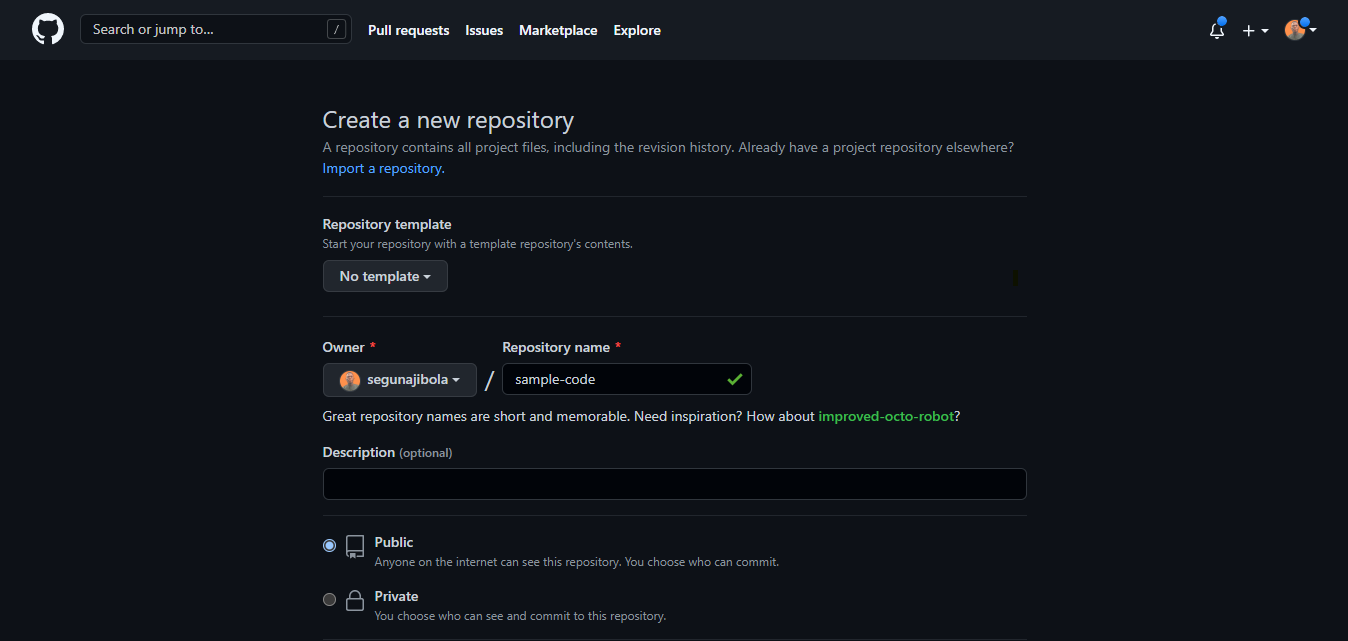
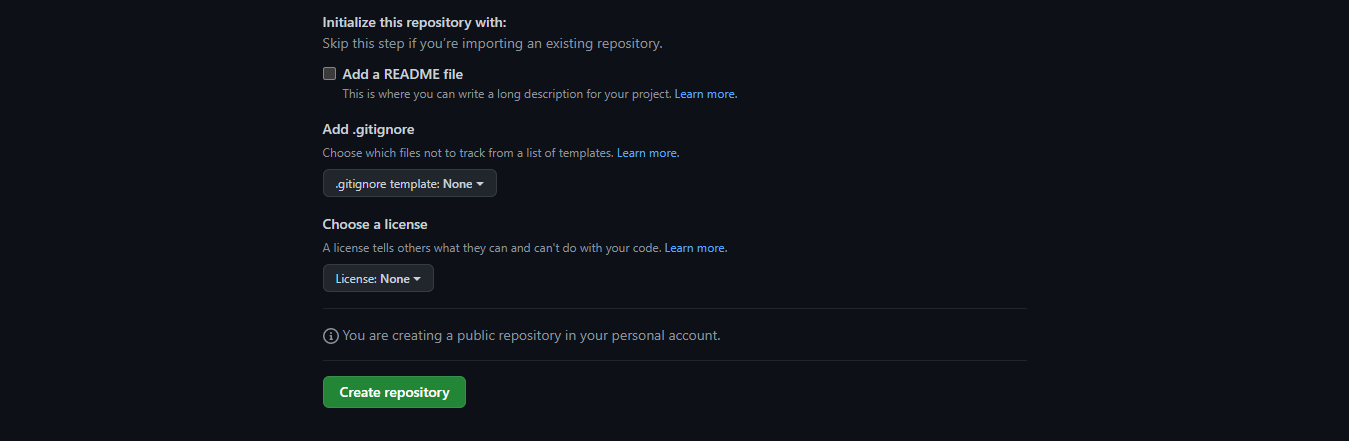
Name your repository and give it a description (this is optional).
Click the "Create repository" button to create the repository. You will be prompted to this page:
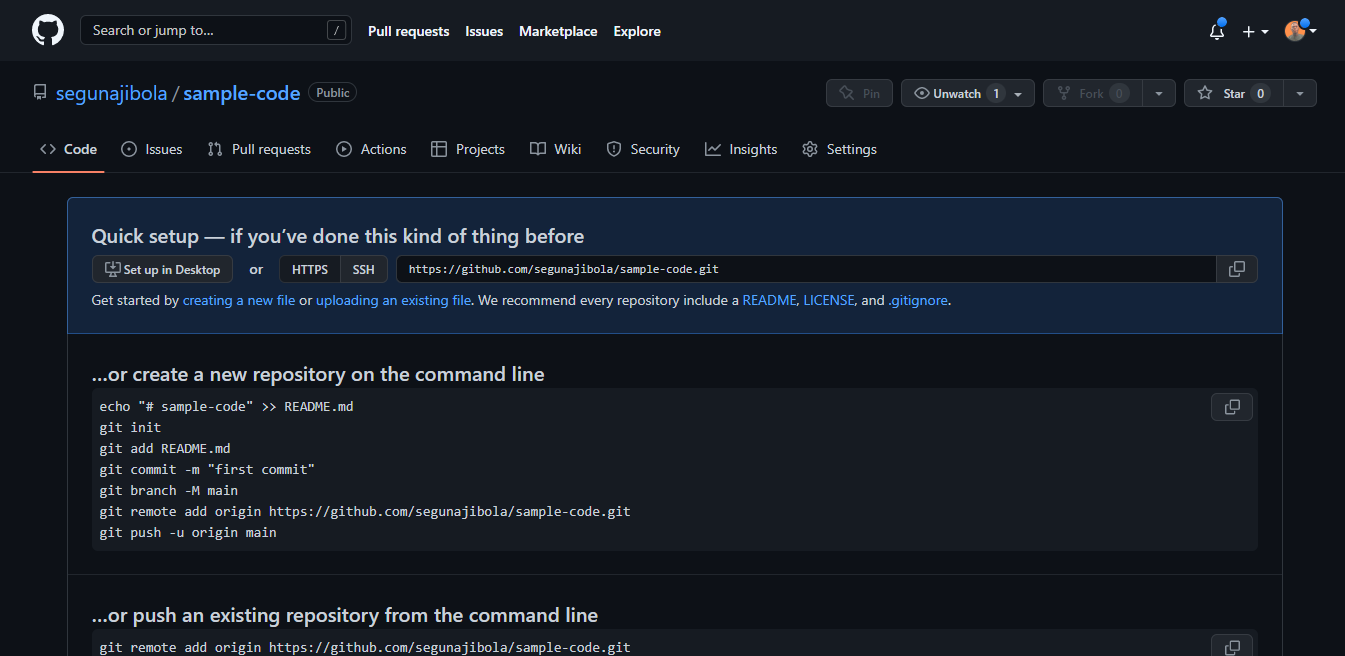
Step 6 – Push your local code to GitHub
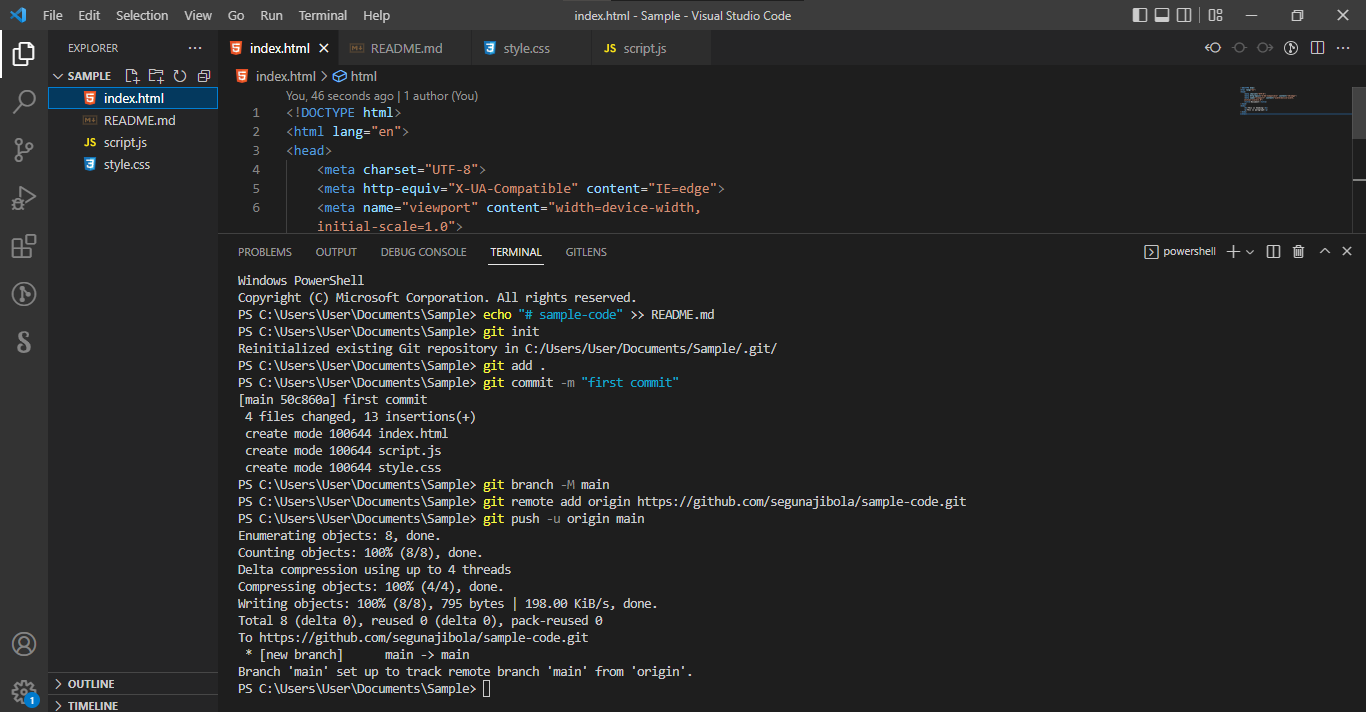
You can use the code editor built-in terminal to use Git to push your code to GitHub. Click ctrl + shift + ' to open the terminal in VSCode.
Input the commands below one after the other in your terminal. Press the Enter key to proceed after every input.
echo "# sample-code" >> README.md
git init
git add .
git commit -m "first commit"
git branch -M main
git remote add origin https://github.com/segunajibola/sample-code.git
git push -u origin main
Note that we have git add README.md in the repository on GitHub. But here we have git add ., which is to let Git add all our code files instead of the README.md file which will be created by echo "# sample-code" >> README.md. So if you have created other files in your local folder, you need to use git add . to add all files.
Take note that git remote add origin https://github.com/segunajibola/sample-code.git will contain the link to your own repository and it will have have the name of your GitHub account.
Common Git Commands to Know
They are many Git commands you can use in the terminal, and that can get overwhelming. So I'd suggest focusing on some of the most popular ones first.
Here they are:
git init lets you initialize Git in your folder.
git add Readme.md lets you add the Readme file, while git add . lets you add all files in the present folder.
git commit stores the added files. Use -m for message followed by the actual message.
git branch creates a new branch which is a new version of the repository as it appears when added, and -M to move the name to main.
git remote add origin finally connects the local folder to the repository on GitHub. It is followed by the repository's link.
git push -u origin main pushes the code to GitHub. The -u flag creates a tracking reference for the branch, and origin main puts the code in the main branch.
Those are some of the main commands you'll use all the time. This is a beginner and non-technical guide to help you get started using Git and GitHub, so we won't go into too much more detail here.
The more you continue using GitHub, the more comfortable you'll get using these commands. The key is to start small and maintain your momentum.
It will eventually get easier as you build small projects and host them on GitHub using Git.
If you find it hard to use the terminal to navigate between folders, spend some time to practice with it. Again, it gets easier with time and use.
Working with Remote Repos
All of the commands we’ve discussed up to this point work with only your local repo. They don’t do any communication to a server or over the network. It turns out that there are only four major Git commands which actually talk to remote repos:
clonefetchpullpush
That’s it. Everything else is done on your local machine. (OK, to be completely accurate, there are other commands that talk to remotes, but they don’t fall into the basic category.)
Let’s look at each of these commands in turn.
Clone
Git clone is the command you use when you have the address of a known repository and you want to make a local copy. For this example, let’s use a small repo I have on my GitHub account, github-playground.
The GitHub page for that repo lives here. On that page you will find a “Clone or Download” button which gives you the URI to use with the git clone command. If you copy that, you can then clone the repo with:
git clone git@github.com:jima80525/github-playground.git
Now you have a complete repository of that project on your local machine. This includes all of the commits and all of the branches ever made on it. (Note: This repo was used by some friends while they were learning Git. I copied or forked it from someone else.)
If you want to play with the other remote commands, you should create a new repo on GitHub and follow the same steps. You are welcome to fork the github-playground repo to your account and use that. Forking on GitHub is done by clicking the “fork” button in the UI.
Fetch
To explain the fetch command clearly, we need to take a step back and talk about how Git manages the relationship between your local repo and a remote repo. This next part is background, and while it’s not something you’ll use on a day-to-day basis, it will make the difference between fetch and pull make more sense.
When you clone a new repo, Git doesn’t just copy down a single version of the files in that project. It copies the entire repository and uses that to create a new repository on your local machine.
Git does not make local branches for you except for master. However, it does keep track of the branches that were on the server. To do that, Git creates a set of branches that all start with remotes/origin/<branch_name>.
Only rarely (almost never), will you check out these remotes/origin branches, but it’s handy to know that they are there. Remember that every branch that existed on the remote when you cloned the repo will have a branch in remotes/origin.
When you create a new branch and the name matches an existing branch on the server, Git will mark you local branch as a tracking branch that is associated with a remote branch. We’ll see how that is useful when we get to pull.
Now that you know about the remotes/origin branches, understanding git fetch will be pretty easy. All fetch does is update all of the remotes/origin branches. It will modify only the branches stored in remotes/origin and not any of your local branches.
Pull
Git pull is simply the combination of two other commands. First, it does a git fetch to update the remotes/origin branches. Then, if the branch you are on is tracking a remote branch, then it does a git merge of the corresponding remote/origin branch to your branch.
For example, say you were on the my_new_feature branch, and your coworker had just added some code to it on the server. If you do a git pull, Git will update ALL of the remotes/origin branches and then do a git merge remotes/origin/my_new_feature, which will get the new commit onto the branch you’re on!
There are, of course, some limitations here. Git won’t let you even try to do a git pull if you have modified files on your local system. That can create too much of a mess.
If you have commits on your local branch, and the remote also has new commits (ie “the branches have diverged”), then the git merge portion of the pull will create a merge commit, just as we discussed above.
Those of you who have been reading closely will see that you can also have Git do a rebase instead of a merge by doing git pull -r.
Push
As you have probably guessed, git push is just the opposite of git pull. Well, almost the opposite. Push sends the info about the branch you are pushing and asks the remote if it would like to update its version of that branch to match yours.
Generally, this amounts to you pushing your new changes up to the server. There are a lot of details and complexity here involving exactly what a fast-forward commit is.
There is a fantastic write-up here. The gist of it is that git push makes your new commits available on the remote server.
Putting It All Together: Simple Git Workflow
At this point, we’ve reviewed several basic Git commands and how you might use them. I’ll wrap up with a quick description of a possible workflow in Git. This workflow assumes you are working on your local repo and have a remote repo to which you will push changes. It can be GitHub, but it will work the same with other remote repos. It assumes you’ve already cloned the repo.
git status– Make sure your current area is clean.git pull– Get the latest version from the remote. This saves merging issues later.- Edit your files and make your changes. Remember to run your linter and do unit tests!
git status– Find all files that are changed. Make sure to watch untracked files too!git add [files]– Add the changed files to the staging area.git commit -m "message"– Make your new commit.git push origin [branch-name]– Push your changes up to the remote.
This is one of the more basic flows through the system. There are many, many ways to use Git, and you’ve just scratched the surface with this tutorial. If you use Vim or Sublime as your editor, you might want to checkout these tutorials, which will show you how to get plugins to integrate Git into your editor:
- VIM and Python – A Match Made in Heaven
- Setting Up Sublime Text 3 for Full Stack Python Development
- Emacs – The Best Python Editor?
If you’d like to take a deeper dive into Git, I can recommend these books:
- The free, online Pro Git is a very handy reference.
- For those of you who like to read on paper, there’s a print version of Pro Git and I found O’Reilly’s Version Control with Git to be useful.
You should also check out the Real Python Podcast Episode 179: Improving Your Git Developer Experience in Python with Adam Johnson.
Finally, if you’re interested in harnessing the power of artificial intelligence in your coding journey, then you might want to play around with GitHub Copilot.
GIT Clone Example:


No comments:
Post a Comment